Congratulations to CVWA member Alan Bishop who has some of his woodwork items (photos above) in the current Wood Symphony Gallery Exhibition, ‘Turned and Sculpted Wood‘. The exhibition is made up of artworks by the most prominent masters of wood art.
The Turned and Sculpted Wood yearly exhibition has become a major event in the wood art world by presenting to the public the finest selection of contemporary wood art from around the world. The current exhibition features over 74 pieces created by national (USA) and international artists.
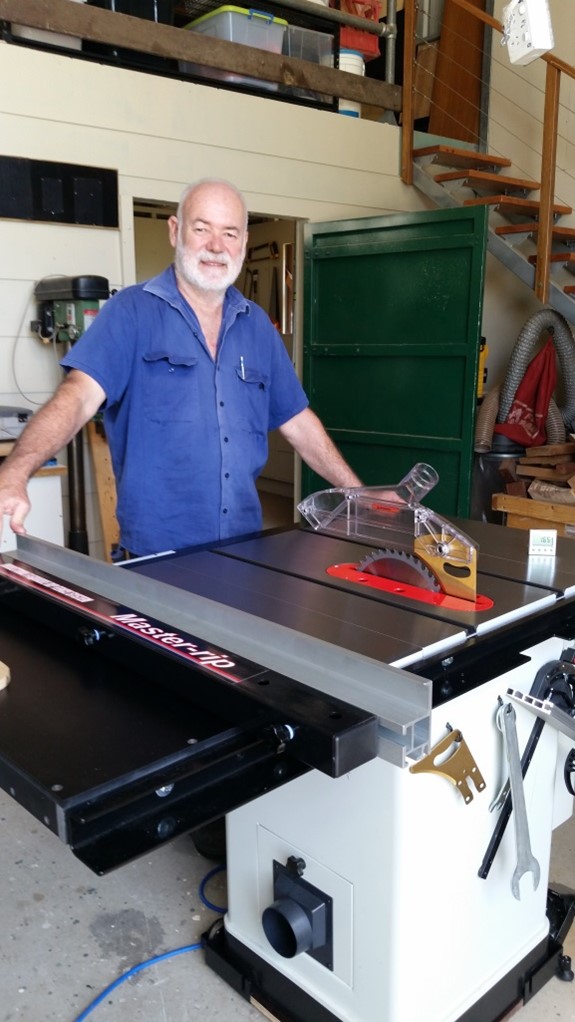
It is with great pleasure we announce the arrival of a new Harvey table saw to augment the array of tools in the Ulmarra shed. Definitely ‘up scaling’ here….. a thing of beauty as well as performance. Reviews suggest that the Harvey HW110LGE table saw represents very good value for money.
The Harvey HLG110LGE Table Saw
The necessary research and leg work was done by club members Neil Cryer and Steve Dodd. Neil has a Laguna at home and Steve has a Harvey. Both are experienced and talented woodworkers regularly using their table saws particularly for box making. They both agreed that the Harvey ticks all the boxes (and makes them!) for the price range. So, Neil organised to purchase the Harvey for the CVWA.
It’s very accurate, quiet, with a wonderful big cast iron table top and the fence glides and locks like a dream. The 3hp motor means it has lots of grunt. It weighs a ton but Neil and Steve fitted a mobile base so that it can be moved around easily. With a 250mm diameter blade rotating at 4300rpm, a ripping capacity of 750mm (with fence attached) and a maximum cutting height of 75mm it should be able to handle most jobs.
Neil and Steve spent some shed hours doing the assembly and finishing touches of fine tuning the fence (see photo). After taking measurements to make a zero tolerance insert, Steve used Boeshield T-9 to wax and protect the top.
Steve fine tunes the fence settings
It was agreed that ‘kid gloves’ and a metal detector would be close by at all times. Given that a number of newer members are interested in box making the new table saw should see a bit of use.
Inspired by Alan Bishop’s post on the CVWA web site ‘Cyclone dust collection for your vacuum’ (May 14, 2020) I embarked on a similar journey. For some time, I have had a commercial 2hp dust extraction system (with pleated filter) plumbed to my lathe and linisher. Emptying the dust bag was a minor hassle and once the dust bag got to about one third capacity there was a reduction in air flow. Alan’s article got me thinking about adding a cyclone system.
The cyclones similar to that which Alan purchased for his workshop vacuum have inlets and outlets around 50mm diameter. All my existing plumbing was 90mm or 100mm diameter and I did not want to reduce to 50mm and adapt back to 100mm. It is possible to purchase cyclones (Oneida) out of the US with 100mm inlets and outlets but they are not cheap. Larger cyclone systems (Hare & Forbes; Carbatec) were not an option because of limited space and cost. So, I decided to build one from scratch.
I purchased a 60L drum with a sealable, but easily removable, lid and then plumbed in a cyclone system (see photo). These heavy-duty plastic drums are available in 60L, 160L and 220L capacities. I would have preferred a 160L drum but could not fit it into the space available.
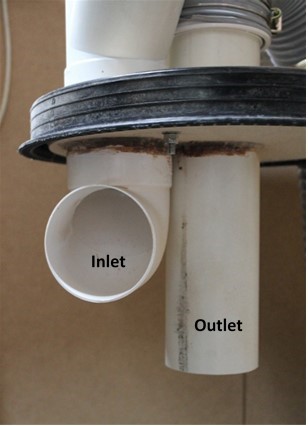
For the inlets and outlet I used 90mm PVC pipe fittings. The 90mm outlet pipe has a 90 to 100mm adaptor that connects to the 100mm flexible dust hose attached to the commercial 2hp dust collector.
Inside the drum the inlet pipe has a 90o bend directed at the side wall of the drum to create a cyclone (see photo). The outlet pipe needs to be located in the vortex (middle). Blast gates at the lathe and on the inlet from the linisher (see photo) allow isolation of ducting and machines.
Positions of inlet and outlet inside the drum.
After assembling the system I did a ‘before and after’ weight test similar to that done by Alan Bishop. I collected and weighed 2kg of dust and shavings, then put it into the inlet pipe at the lathe. I then weighed the contents of the drum. My home-built effort captured 99.1% of the dust/chips/shavings. This compared favourably with Alan’s system removing 99.7%.
The system has now been in use for a few weeks and I am very happy with how it works. A search of YouTube or Pinterest shows that there are many variations for home made cyclone dust separators and one of these may suit your situation.
Recently three CVWA members (Neil Cryer, Terry Hulm and Bob Aitken) each purchased an Axminster Eccentric Spiralling Chuck. This chuck, made in Axminster UK using CNC techniques, is typically used for a variety of eccentric geometric patterns and spiralling stems. Here Bob, Neil and Terry describe the chuck, show some or their initial work and comment about their use of the chuck.
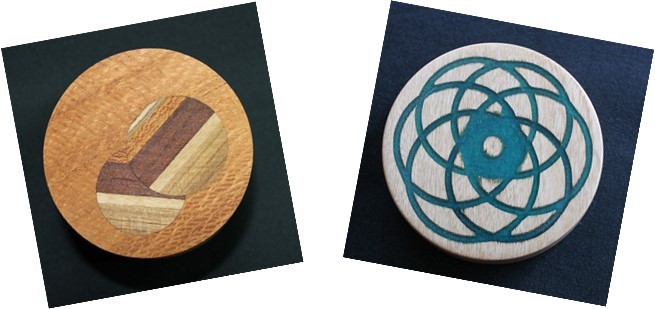
The Axminster chuck (Photo. 1) consists of a faceplate ring which can be held by a conventional four-jaw (dovetail) chuck, a central main plate which can be adjusted to create different amounts of offset, and a small faceplate that can be indexed to 12 positions. The 12 indexing positions on the small faceplate can be seen in Photo. 1. The small faceplate is attached to the workpiece by three screws.
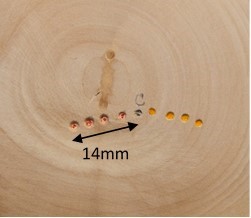
For offset positions there are four settings clockwise and four anticlockwise. By loosening the counter sunk machine screws on the main plate, the plate can be rotated and set to any of the threaded holes on the faceplate ring. The extent of offsets (centres) achievable are shown on a workpiece in Photo. 2. The centre is shifted by approximately 4, 7, 11 and 14mm as the main plate is moved successively from one hole to the next. These eight offset positions combined with the 12 indexing positions on the small faceplate allow for the creation of a large number of geometric patterns.
Photo. 1. Axminster chuck components (left) and the assembled chuck. Photo. 2. Centre with no offset (C) and with offsets for clockwise (red) and anticlockwise (yellow) rotation of the main plate.
Bob’s comments and workpieces
Prior to purchasing this chuck I had not owned an offset chuck. So initially, I explored its offset capabilities and turned a few offset items (see photos) leaving Neil and Terry to explore the pattern and inlay possibilities of combining offset and indexing.
Although the instructions mention gluing the indexed faceplate to the workpiece, I used screws that imbedded at least 15 to 20mm into the workpiece as I considered this safer. Consequently, this means that 20mm is sacrificed from bottom of the workpiece. An alternative I used for one workpiece was to attach the workpiece with wood glue to a sacrificial piece of timber screwed to the faceplate.
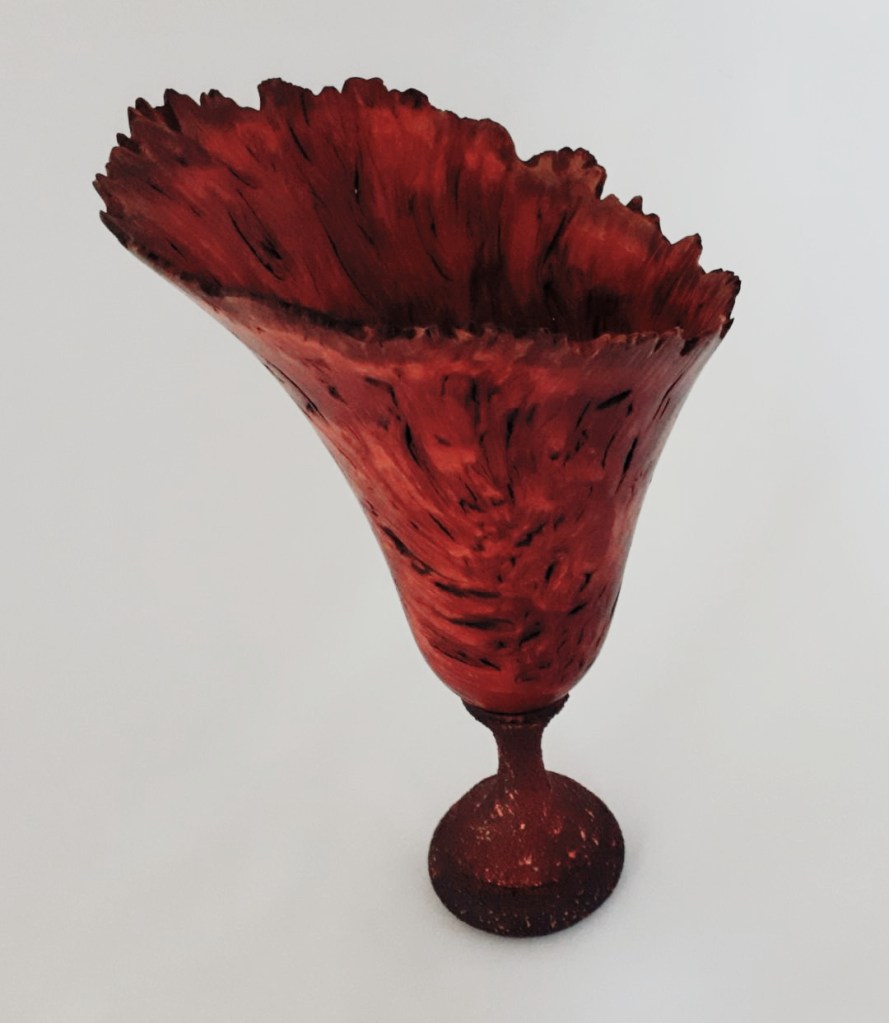
The Axminster eccentric spiralling chuck is probably best used for small to medium sized workpieces. The size of the workpiece is limited by the ability of your lathe to handle imbalance. However, my first item was a large (300mm diameter) offset bowl. Because of imbalance I had to turn this bowl at a very low lathe speed. Even for relatively smaller items such as the offset bud vases shown a low lathe speed was needed.
Although I have yet to do any geometric patterns, the chuck, in my view, represents good value for money. On the downside I would have preferred the indexed faceplate to be of steel rather than aluminium as it is easily scratched and marked. Instructions provided with the chuck were not particularly helpful.
An offset Jcaranda bowl and two offset bud vases turned by Bob Aitken using the Axminster chuck.
Neil’s comments and workpiece
This first trial using an eccentric chuck took quite a while as the variations available take time to digest. It’s a fiddle to keep taking the chuck off the lathe for adjustments and the instructions are scant. However, it was a most entertaining first attempt and there will be much more work done with this chuck!
Offset inlay in a lidded bowl using the Axminster chuck by Neil Cryer.
Terry’s comments and workpieces
To do the geometric patterns shown in the photos below, both the offset and indexing capabilities of the chuck are utilised. To change the indexing position, the Axminster chuck has to be removed from the conventional four-jaw chuck, a machine screw loosened, and the small faceplate rotated to the desired position. When remounted this can result in very slight alignment changes. Similarly, loosening the machine screws to offset the main plate results in the faceplate ring loosening in the jaws and may result in a small realignment issue. I plan to investigate the use of a spacer on the four-jaw chuck to prevent the Axminster faceplate ring moving when the machine screws are loosened.
Terry Hulm used the Axminster chuck for geometric patterns with resin inlay and geometric texture.
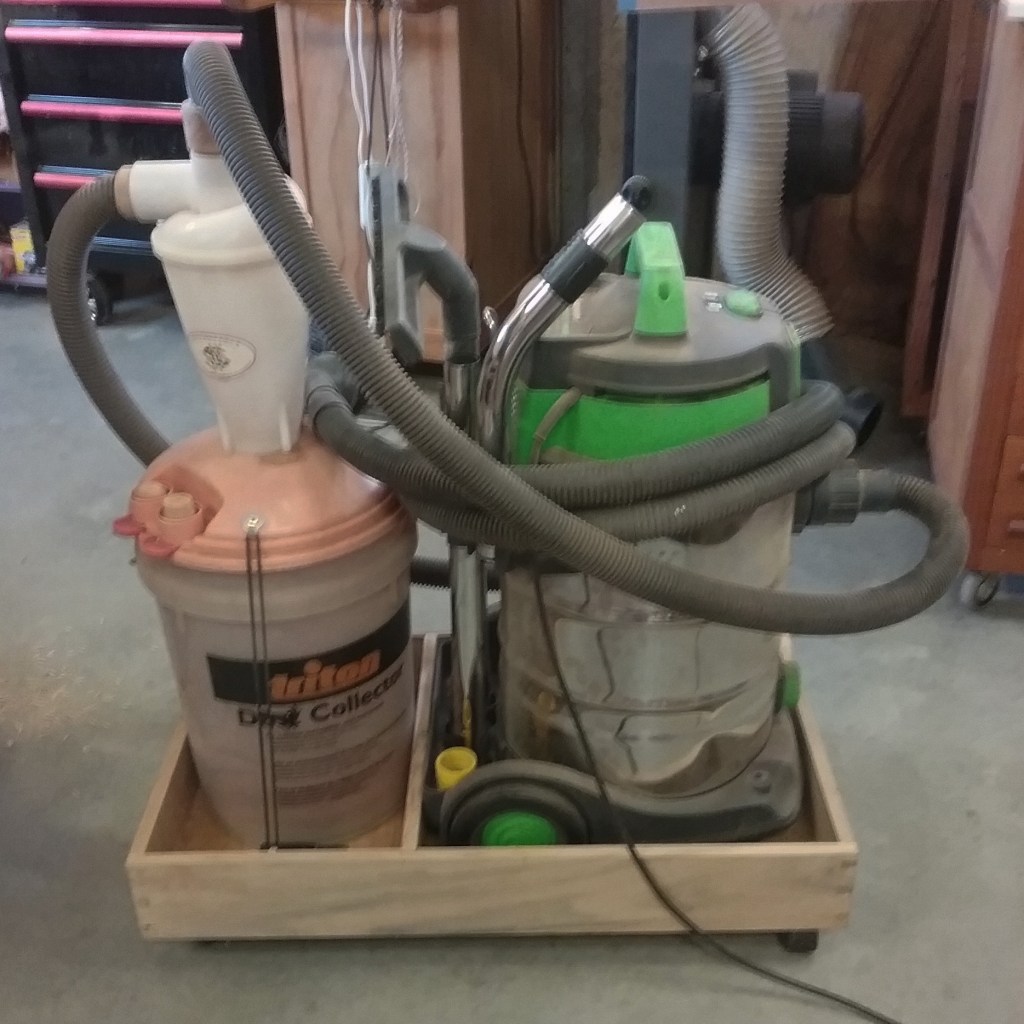
A couple of years ago, I wanted to upgrade my dust collection system. The Triton dust bucket worked OK, but the filter blocked a fair bit, and a fair bit of dust got through to the vacuum bag. And cleaning the filter was messy.
Carbatec sell the American Oneida system – a cyclone and dust bucket. I’ve no doubt that its a good product, and probably worth the money, but it was more than I was prepared to spend at the time.
So I went on to eBay, or evilBay, as my son calls it – found a bunch of cheaper and similar cyclones – bought one for not much money. (For what its worth, they are are even cheaper now!) When the unit arrived, I started to look for fittings to connect my hoses to the cyclone inlet and outlet.
Finally, after a lot of procrastinating, I turned a couple of fittings out of pine. I re-purposed the old Triton bucket, sealed the cracks in the bottom and hooked up the system to the Trade Tools Industrial vacuum cleaner. It worked.
There was a drawback – the system was cumbersome to move around, and I would regularly tip it over, which didn’t do much for its dust collection. Two years later, I made a dinky cart for the vacuum cleaner and cyclone.
How well does it work? I used the system for all sorts – sanding dust, floor dust, router table, power saw dust, chisel chips, what ever. I swept up the most of the big plane shavings because the neighbour has chooks, and we swap eggs for sawdust. But everything else went into the cyclone. When the Triton bucket was about 2/3 full, I emptied it and weighed the sweepings – around 2kg. I took the vacuum bag out (new bag), weighed it, emptied the dust out and shook it about, weighed it again – 5 gram of dust made it into the vacuum cleaner. That means approximately 99.7% of the dust stayed in the cyclone.
It took a few years, and if I’d bought the Oneida system, I might have been using it form the get go. But all said and done – Happy with that!
Bob Aitken has contributed these photos and story regarding the CVWA Jacaranda Festival display.
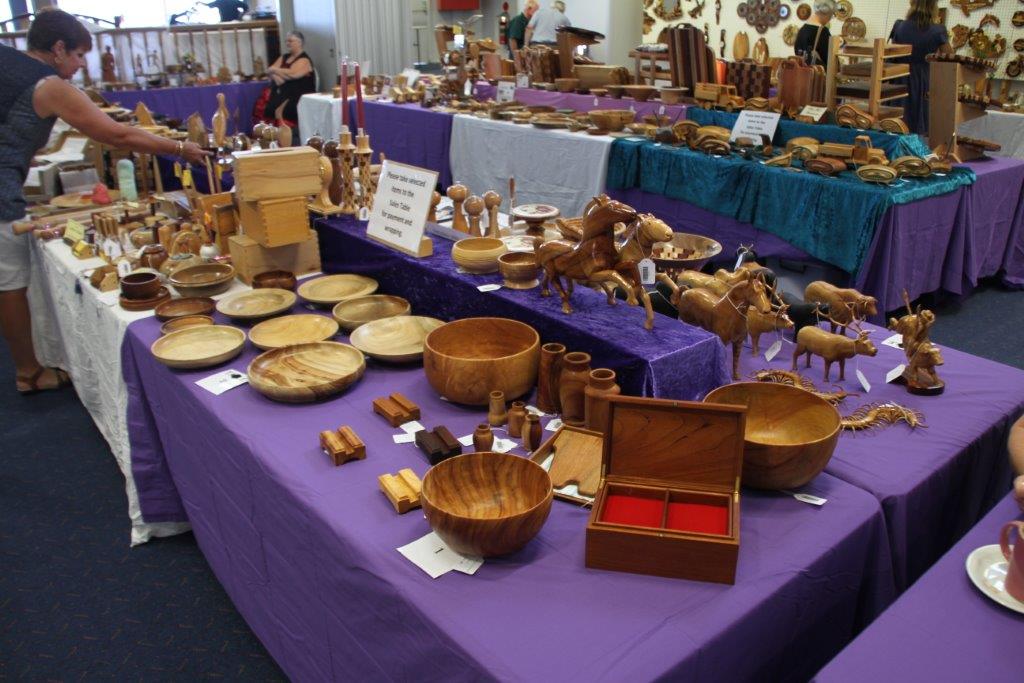
A major event each year for the Clarence Valley Woodworkers Association is the Jacaranda woodwork display and competition held in conjunction with the Grafton Jacaranda Festival.
The club started Jacaranda Festival woodwork displays in the late 1980’s and, in these early years, may have had only two or three members displaying work. The event has grown steadily since that time and in recent years around 25 to 30 members have participated in the display with over 2000 items listed for display/sale each year. Most participating members display items and offer them for sale. A few members choose to display only. The display is open for nine days incorporating the first week of November.
The competition section has also grown with eight woodwork classes ranging from furniture to toys and puzzles to a novice section thereby catering for all types of woodwork. The competition is open to both CVWA members and the public with a small entry fee for non-members. There are typically over 50 entries for the open competition each year.
The display and the competition sections serve to encourage members to produce high quality woodwork.
There is a separate High School Student’s competition section that has expanded markedly in recent years. This section now receives around 60 to 120 entries from up to 6 high schools in the area. Entries in the open competition are assessed by experienced woodwork identities from outside the club while school student entries are judged by a panel of club members.
Demonstrations of woodwork activities such as carving, turning, scroll saw work, pyrography and texturing are given by members on most days during the display.
During the display woodwork donated by members is raffled and the proceeds donated to local community appeals (eg. Westpac Rescue Helicopter Service).
For many years the display has been held in the upstairs auditorium of the South Grafton Ex-Services Club, Wharf Street, South Grafton. This is a great venue overlooking the Clarence River with dining and refreshment facilities available. Come and visit us during Jacaranda and see a great display with a large variety of woodwork items.
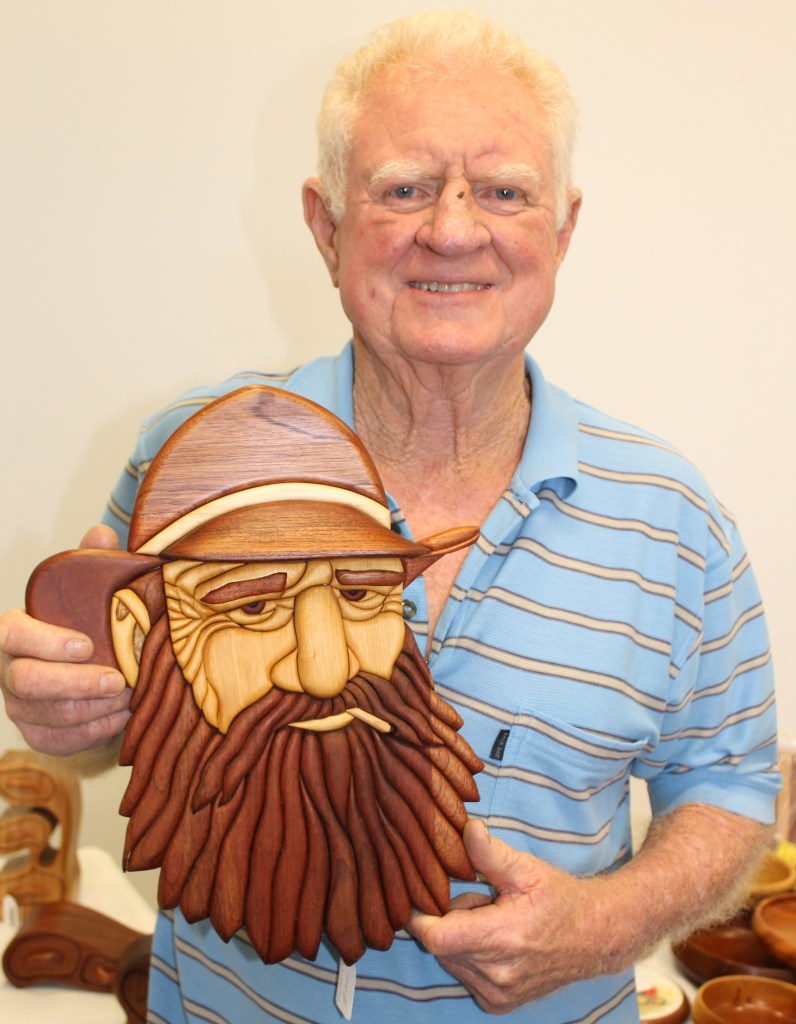
Bob Aitken has been trawling through his photo archives. He sent us a bunch of great photos of work by CVWA members, including this great pic of Bill Andrews with one of his marvelous intarsia works.
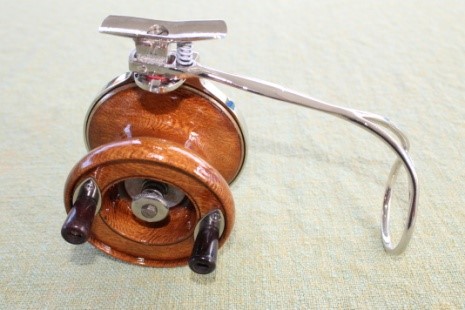
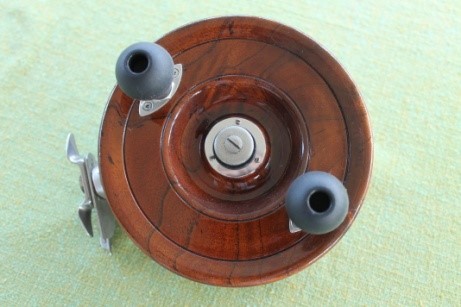
Alvey (late 1920s – early 1930s) with a spring loaded (Gem) centre pivot and Silky Oak reel. Restored by Bob Aitken.
Bob Aitken has provided this story on anniversary of the remarkable Alvey fishing reels.
This year (2020) is the 100th anniversary for iconic Australian fishing reel manufacturer Charles Alvey & Sons. Over the 100 years, Alvey have used a range of materials for their reels (eg. Bakelite spools were introduced in 1936; graphite backing plates in the 1990’s) but here I will mainly describe their wooden reels.
The company began production in 1920 when Charles Alvey used a treadle lathe (no electricity at the factory) to turn spools and backing plates from Silky oak. By the mid 1920’s powered lathes enabled the backing plates to be machined from gunmetal and the spindles made from brass. Rosewood and Red Bean (Miva Mahogany) timbers were used to turn spools.
For a brief period after World War II, post war material shortages lead to the use of Camphor Laurel for spools. For the larger diameter spools it was necessary to replace Camphor Laurel (which had inconsistent grain) with finer grained cedar. By the 1950’s Australian Red Cedar was used almost exclusively for the spools.
Alvey reels are known for their quality and longevity so pre-production treatment of the timber was important. Selected cedar was slabbed and seasoned for two years. Spools were rough turned and then set aside for a further two months before final turning. I have restored a number of wooden Alvey reels from the 1950’s and have been impressed by the general soundness of the old spools and fittings.
In 1974 Alvey stopped using cedar and the spools were made from a polyester and fibreglass mix. However, the company has marked anniversary milestones by producing limited editions of reels with Cedar spools.
Restored 1960s era Alvey reel with a Red Cedar spool.Old Alvey spools used to make Reel Clocks
Each time I edited a page as I put this website together, the WordPress editor would ask me if I wanted to ‘launch’ the website. This begs the question – just how do you ‘launch’ a website -brand new, freshly constructed, and still a bit rough around the edges. I mean, pressing a button on the screen lacks a little something.
Should we have have some sort of ceremony, like launching a ship? Perhaps a bottle of inexpensive champagne, and one of the ladies swinging a mallet to smash the bottle over the computer? Or perhaps like launching a rocket, with a countdown followed by lots of smoke and noise, or perhaps just a big bang?
Anyhow – it has been a long while coming, and for better or worse, it is here. Enjoy, and check in regularly. When the corona virus fades, we will begin to resume normal club activities. The shed will open, sawdust will be made, and wonderful new works come out into the sun. We will have meetings, slabbing days and morning coffee gatherings. There will be plans to make, projects to kick off, stories to tell, and perhaps a small fib or two.
At this stage, the Jacaranda show is still scheduled. After all of the uninterrupted workshop time, we look forward to a bumper crop of new pieces for display or sale.
Until we get back to normal, we will still communicate on the interweb – either this website or our Facebook page (Clarence Valley Woodies). Check it out, and show us your latest work. We would love to put your photos on this website.
Stay calm, stay safe and make sawdust!
PS – Bob Chesworth’s strip plank kayak pictured above has already been launched, possibly with champagne!
Welcome to the website of the Clarence Valley Woodworkers Association Inc.
This web site has been put together using WordPress and the WordPress Website builder. WordPress offers a free plan, so we can see if it works at no cost to the club. However, the free plan has a hidden cost – you may see some advertisements!
If all goes well, the club may upgrade to a Plan which has some small cost to the club. WordPress offers a number of plans – some suited to small business. These plans offer more features and flexibility, including e-commerce. However, that is some distance down the track!
Finally, the disclaimer… I have no professional expertise in creating websites. I have no formal training, and I’ve only made a couple of websites for private use. While I welcome any constructive advice or criticism, please be gentle with me and forgive my inadequacies.
What to expect for the future?
The one factor that makes some websites and social media sites more successful others is regular and fresh new content. That means regular updates, blog pages, and new content. For that, we will depend on you, the club members… So please send photos, stories, items for sale, news and views. I will try to provide regular updates that incorporate your contributions.
The site will hold copies of Chip Chat and the Bulletin. It will have a calendar of sorts (if I can figure out how it’s done), or at least a list of coming events. There will be a list of workshops available. There will be a list of timber for sale. There will be a place where new members can contact us about joining. These may take a little time, but they can be added once the site goes live to air!