The Australian Wood Review magazine is running its Maker of the Year event, with support from Carbatec and other sponsors. The event sets out to encourage talented and innovative woodworkers from Australia, New Zealand and around the world, with a prize pool of $23,000.
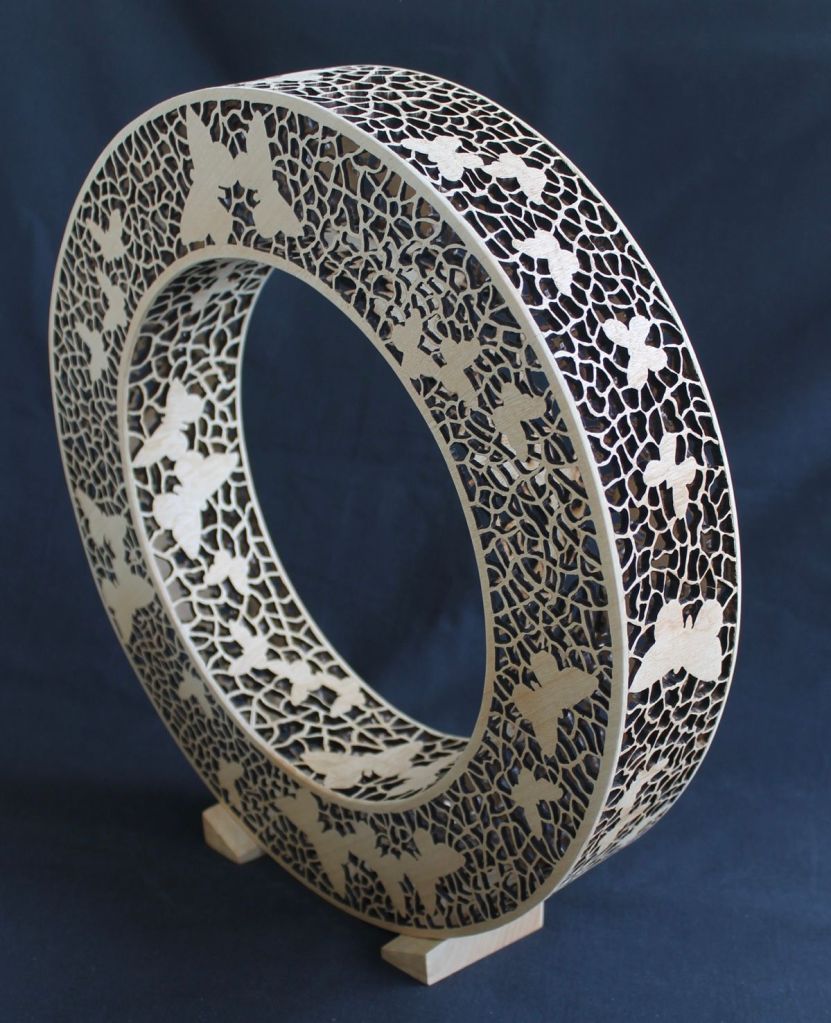
Neil Cryer has entered his award winning ‘Butterfly Fantasy’ – a wonderfully light and delicate turned and pierced piece. (Neil was awarded ‘Best Overall’ in the Lower Clarence Art and Crafts Festival woodwork competition).
Over the course of the event, Australian Wood Review showcases selected works from the competition entries on its Facebook and Instagram pages throughout the year.
This week, it was Neil’s entry that was chosen to be showcased via Facebook and Instagram, with the caption as follows:-
“Here’s Neil Cryer’s entry: Butterfly Fantasy is “transparent in part and incredibly light in construction from the end of a heavy 400mm diameter windfall jacaranda log”.
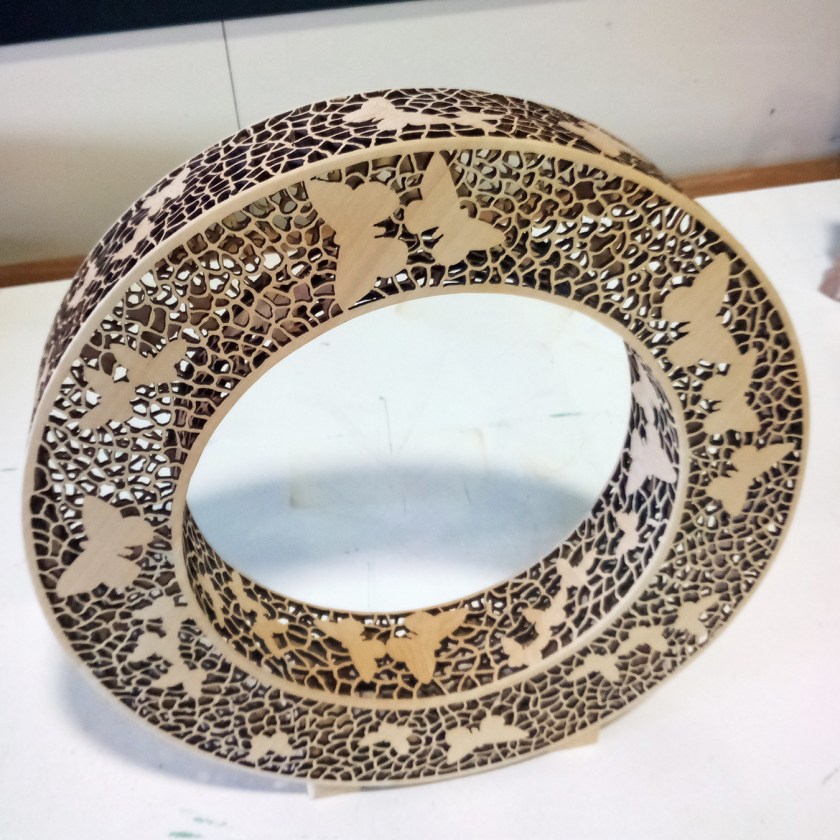
Another recent picture of Neil’s entry to Maker of the Year.
Note that entries to the ‘Maker of the Year’ close on 5 September.
If you are in town and running errands instead of getting out to the shed, drop into your newsagents and get the latest issue of Australian Woodworker magazine. The magazine features an article by CVWA member and Jacaranda festival stalwart Bob Aitken on his adventures in making clocks with poured resin decorations.
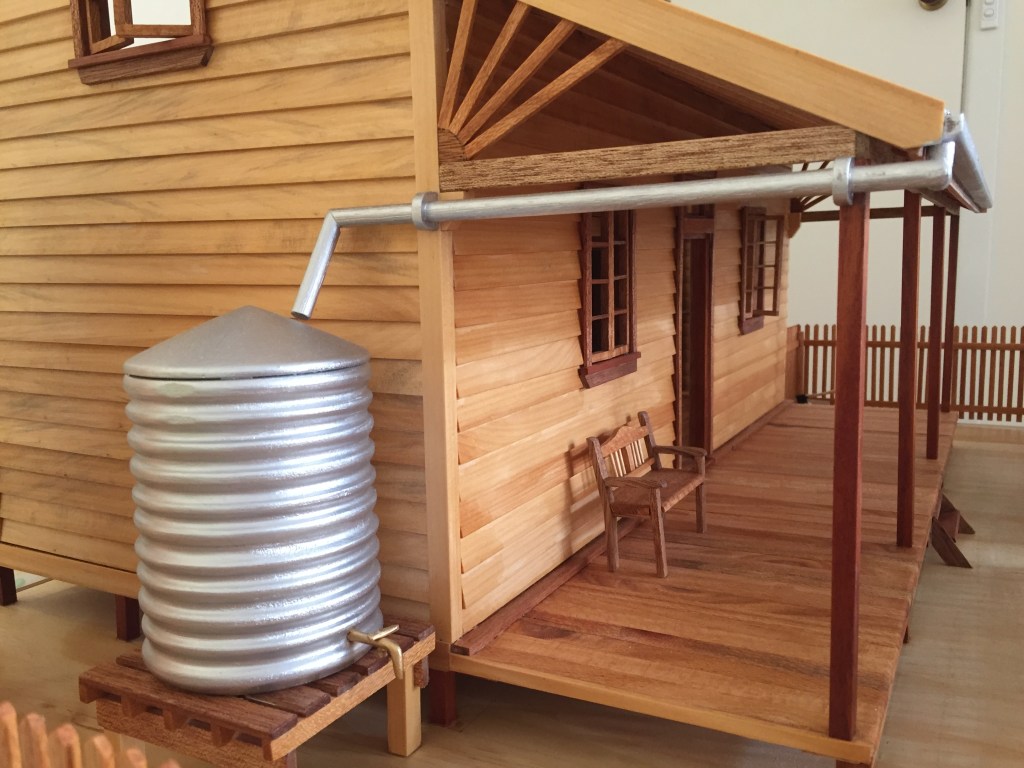
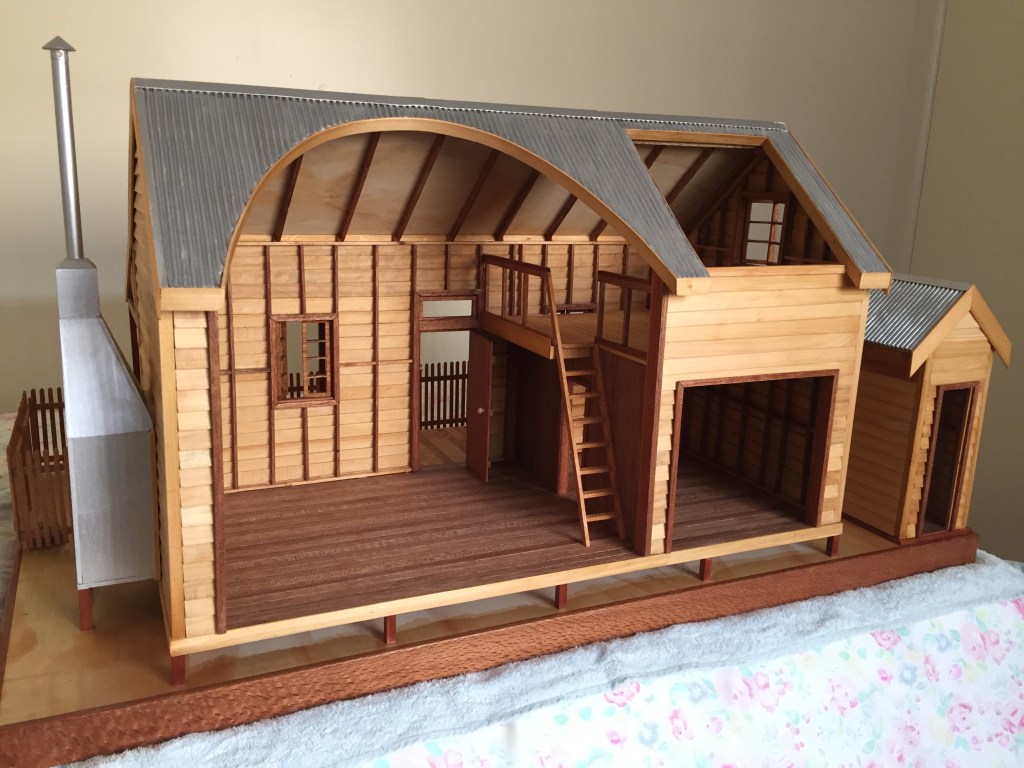
CVWA member Dick White has been spending some time in the shed during COVID restrictions. He recently finished a doll’s house for one of his granddaughters – see photos. Now working on a truck for his grandson. Well done Dick – a ripper of a doll’s house by CVWA member Dick White.
This is a proper Australian Dolls House. Does it have a redback?
Inspired by Alan Bishop’s post on the CVWA web site ‘Cyclone dust collection for your vacuum’ (May 14, 2020) I embarked on a similar journey. For some time, I have had a commercial 2hp dust extraction system (with pleated filter) plumbed to my lathe and linisher. Emptying the dust bag was a minor hassle and once the dust bag got to about one third capacity there was a reduction in air flow. Alan’s article got me thinking about adding a cyclone system.
The cyclones similar to that which Alan purchased for his workshop vacuum have inlets and outlets around 50mm diameter. All my existing plumbing was 90mm or 100mm diameter and I did not want to reduce to 50mm and adapt back to 100mm. It is possible to purchase cyclones (Oneida) out of the US with 100mm inlets and outlets but they are not cheap. Larger cyclone systems (Hare & Forbes; Carbatec) were not an option because of limited space and cost. So, I decided to build one from scratch.
I purchased a 60L drum with a sealable, but easily removable, lid and then plumbed in a cyclone system (see photo). These heavy-duty plastic drums are available in 60L, 160L and 220L capacities. I would have preferred a 160L drum but could not fit it into the space available.
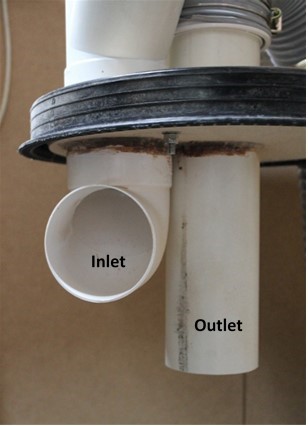
For the inlets and outlet I used 90mm PVC pipe fittings. The 90mm outlet pipe has a 90 to 100mm adaptor that connects to the 100mm flexible dust hose attached to the commercial 2hp dust collector.
Inside the drum the inlet pipe has a 90o bend directed at the side wall of the drum to create a cyclone (see photo). The outlet pipe needs to be located in the vortex (middle). Blast gates at the lathe and on the inlet from the linisher (see photo) allow isolation of ducting and machines.
Positions of inlet and outlet inside the drum.
After assembling the system I did a ‘before and after’ weight test similar to that done by Alan Bishop. I collected and weighed 2kg of dust and shavings, then put it into the inlet pipe at the lathe. I then weighed the contents of the drum. My home-built effort captured 99.1% of the dust/chips/shavings. This compared favourably with Alan’s system removing 99.7%.
The system has now been in use for a few weeks and I am very happy with how it works. A search of YouTube or Pinterest shows that there are many variations for home made cyclone dust separators and one of these may suit your situation.
Lost Arts Press is a small independent USA based publishing house that specialises in publishing books about woodwork. Some of their titles are new, some are reprints of older books or magazine articles. They are mostly USA based, but many of the books are from other countries – UK, France even Latvia!
The books are stocked in Australia by Lie-Neilson Australia and by Carbatec. I have a couple of Lost Arts Press books – they are well made, usually with cloth bindings and quality paper. They are also well written and well designed.
Lost Arts Press is the brainchild of Christopher Schwartz, woodworker, teacher, journalist, author and former editor of Popular Woodworking Magazine. He is driven by his personal commitment to what he calls ‘Amercian Anarchy’ – and it doesn’t involve bombs and revolution.
Lost Arts Press have released the book ‘The Anarchist’s Workbench’ as a free download in .pdf format – which means that you can read the book on your computer, your tablet device or even your smart phone. Or you can print the book from your computer to your home printer – although at 316 pages, it will chew through a bit of paper and ink!
I haven’t read all of the book yet, but I have enjoyed what I have read so far. Chris Schwartz begins The Anarchist’s Workbench with a bit of history of his experiences with work benches and a bit about his personal approach to woodworking and life in general. He describes the bench that is the distillation of his experience with work benches, and then he describes the process of making the Anarchist’s Workbench. The book also has sections on historical work benches, bench hardware, fixtures and fittings – even using a bench with no vices!
Workbenches are a very personal tool. Some folks are workbench obsessed, and want the best ever workbench – they can turn their benches in to works of art, making them out of exotic timbers, fitted with exotic hardware and costing a mint. Some woodworkers use an old door on trestles as their workbench – I did for years. There are as many different points of view on what makes the ideal workbench as there are opinions on the ideal bench hardware.
The Anarchist’s Workbench is designed to be affordable, practical and highly effective, using construction timber to make the bench top and structure. And I’m sure it works very well. The book is written for readers from the USA, but the information and advice can be applied to Australian woodworkers.
The book also reflects the authors interest in historical benches and woodworking methods – that’s OK too. The reader can take or leave the advice, and make a bench to suit themselves.
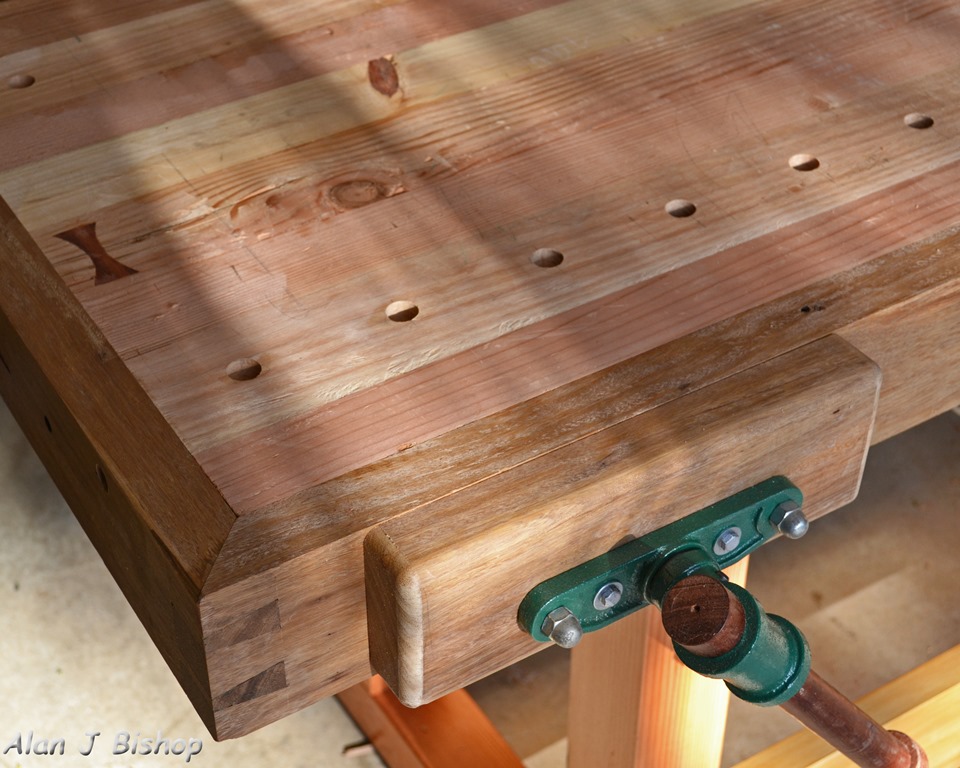
For what its worth, my own bench (pictured above and below) was made mostly of oregon that was pulled out of a verandah and deck of our house at the time, as well as other odd timbers – recycled bridge timbers and even some treated pine 190 x 45 that we had lying around. I used low cost vices, and fitted them out with hardwood faces. At the back of my mind was the idea that I could always build another one if my bench disappointed. It may not be perfect, but I’m not disappointed with it, and I have no plans to replace or upgrade it.
If you are interested in workbenches, or you secretly want the coolest workshop, or you desperately need a bench of your own, down load the free book and start reading. Once you have read the book, sketch up the bench you want to work with, and start building. How hard can it be?
To download the book, click here and follow the links…
Recently three CVWA members (Neil Cryer, Terry Hulm and Bob Aitken) each purchased an Axminster Eccentric Spiralling Chuck. This chuck, made in Axminster UK using CNC techniques, is typically used for a variety of eccentric geometric patterns and spiralling stems. Here Bob, Neil and Terry describe the chuck, show some or their initial work and comment about their use of the chuck.
The Axminster chuck (Photo. 1) consists of a faceplate ring which can be held by a conventional four-jaw (dovetail) chuck, a central main plate which can be adjusted to create different amounts of offset, and a small faceplate that can be indexed to 12 positions. The 12 indexing positions on the small faceplate can be seen in Photo. 1. The small faceplate is attached to the workpiece by three screws.
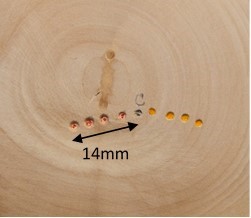
For offset positions there are four settings clockwise and four anticlockwise. By loosening the counter sunk machine screws on the main plate, the plate can be rotated and set to any of the threaded holes on the faceplate ring. The extent of offsets (centres) achievable are shown on a workpiece in Photo. 2. The centre is shifted by approximately 4, 7, 11 and 14mm as the main plate is moved successively from one hole to the next. These eight offset positions combined with the 12 indexing positions on the small faceplate allow for the creation of a large number of geometric patterns.
Photo. 1. Axminster chuck components (left) and the assembled chuck. Photo. 2. Centre with no offset (C) and with offsets for clockwise (red) and anticlockwise (yellow) rotation of the main plate.
Bob’s comments and workpieces
Prior to purchasing this chuck I had not owned an offset chuck. So initially, I explored its offset capabilities and turned a few offset items (see photos) leaving Neil and Terry to explore the pattern and inlay possibilities of combining offset and indexing.
Although the instructions mention gluing the indexed faceplate to the workpiece, I used screws that imbedded at least 15 to 20mm into the workpiece as I considered this safer. Consequently, this means that 20mm is sacrificed from bottom of the workpiece. An alternative I used for one workpiece was to attach the workpiece with wood glue to a sacrificial piece of timber screwed to the faceplate.
The Axminster eccentric spiralling chuck is probably best used for small to medium sized workpieces. The size of the workpiece is limited by the ability of your lathe to handle imbalance. However, my first item was a large (300mm diameter) offset bowl. Because of imbalance I had to turn this bowl at a very low lathe speed. Even for relatively smaller items such as the offset bud vases shown a low lathe speed was needed.
Although I have yet to do any geometric patterns, the chuck, in my view, represents good value for money. On the downside I would have preferred the indexed faceplate to be of steel rather than aluminium as it is easily scratched and marked. Instructions provided with the chuck were not particularly helpful.
An offset Jcaranda bowl and two offset bud vases turned by Bob Aitken using the Axminster chuck.
Neil’s comments and workpiece
This first trial using an eccentric chuck took quite a while as the variations available take time to digest. It’s a fiddle to keep taking the chuck off the lathe for adjustments and the instructions are scant. However, it was a most entertaining first attempt and there will be much more work done with this chuck!
Offset inlay in a lidded bowl using the Axminster chuck by Neil Cryer.
Terry’s comments and workpieces
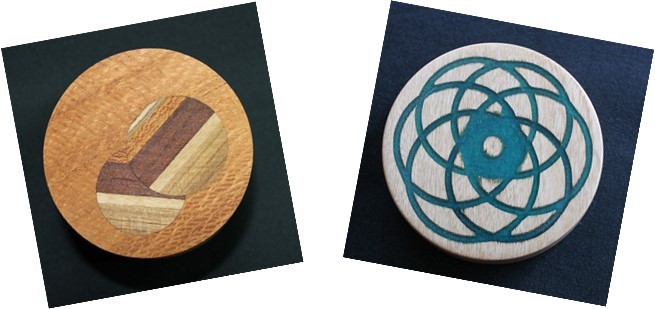
To do the geometric patterns shown in the photos below, both the offset and indexing capabilities of the chuck are utilised. To change the indexing position, the Axminster chuck has to be removed from the conventional four-jaw chuck, a machine screw loosened, and the small faceplate rotated to the desired position. When remounted this can result in very slight alignment changes. Similarly, loosening the machine screws to offset the main plate results in the faceplate ring loosening in the jaws and may result in a small realignment issue. I plan to investigate the use of a spacer on the four-jaw chuck to prevent the Axminster faceplate ring moving when the machine screws are loosened.
Terry Hulm used the Axminster chuck for geometric patterns with resin inlay and geometric texture.
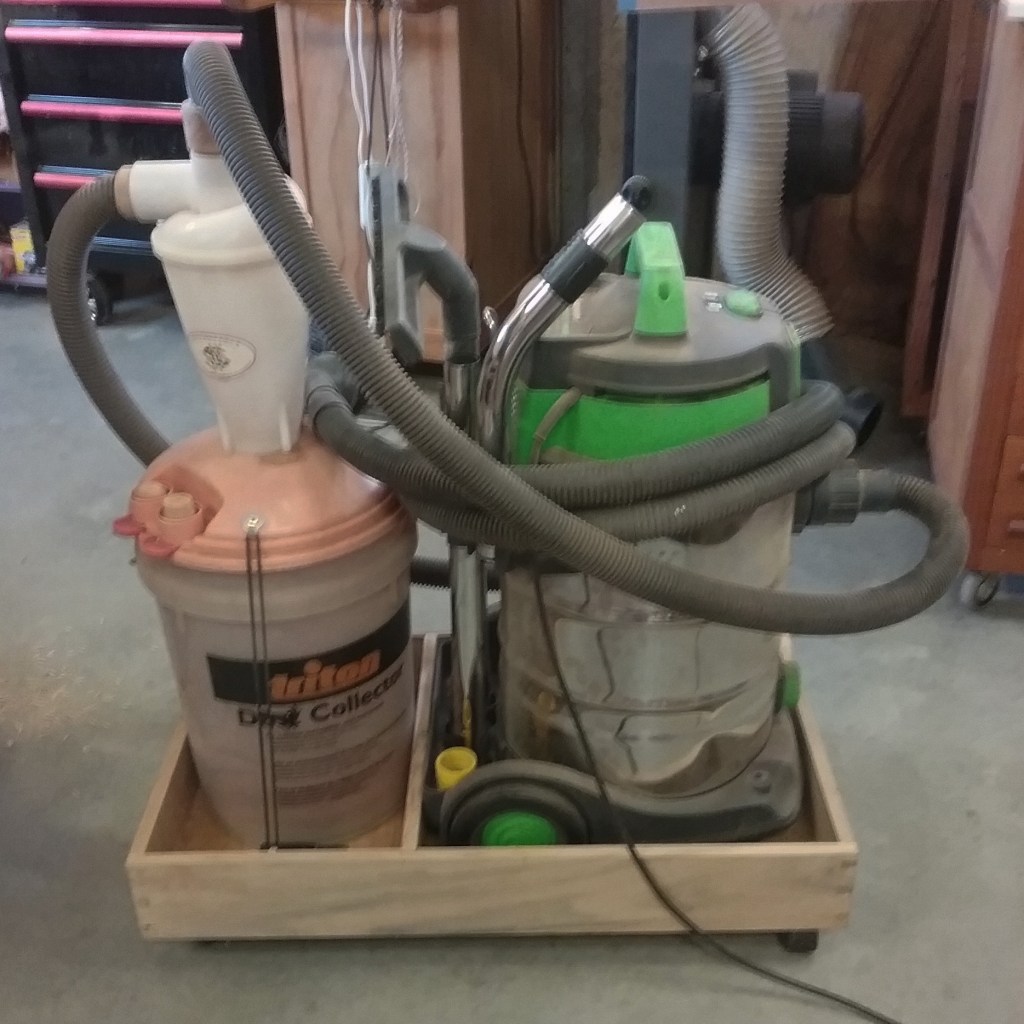
A couple of years ago, I wanted to upgrade my dust collection system. The Triton dust bucket worked OK, but the filter blocked a fair bit, and a fair bit of dust got through to the vacuum bag. And cleaning the filter was messy.
Carbatec sell the American Oneida system – a cyclone and dust bucket. I’ve no doubt that its a good product, and probably worth the money, but it was more than I was prepared to spend at the time.
So I went on to eBay, or evilBay, as my son calls it – found a bunch of cheaper and similar cyclones – bought one for not much money. (For what its worth, they are are even cheaper now!) When the unit arrived, I started to look for fittings to connect my hoses to the cyclone inlet and outlet.
Finally, after a lot of procrastinating, I turned a couple of fittings out of pine. I re-purposed the old Triton bucket, sealed the cracks in the bottom and hooked up the system to the Trade Tools Industrial vacuum cleaner. It worked.
There was a drawback – the system was cumbersome to move around, and I would regularly tip it over, which didn’t do much for its dust collection. Two years later, I made a dinky cart for the vacuum cleaner and cyclone.
How well does it work? I used the system for all sorts – sanding dust, floor dust, router table, power saw dust, chisel chips, what ever. I swept up the most of the big plane shavings because the neighbour has chooks, and we swap eggs for sawdust. But everything else went into the cyclone. When the Triton bucket was about 2/3 full, I emptied it and weighed the sweepings – around 2kg. I took the vacuum bag out (new bag), weighed it, emptied the dust out and shook it about, weighed it again – 5 gram of dust made it into the vacuum cleaner. That means approximately 99.7% of the dust stayed in the cyclone.
It took a few years, and if I’d bought the Oneida system, I might have been using it form the get go. But all said and done – Happy with that!
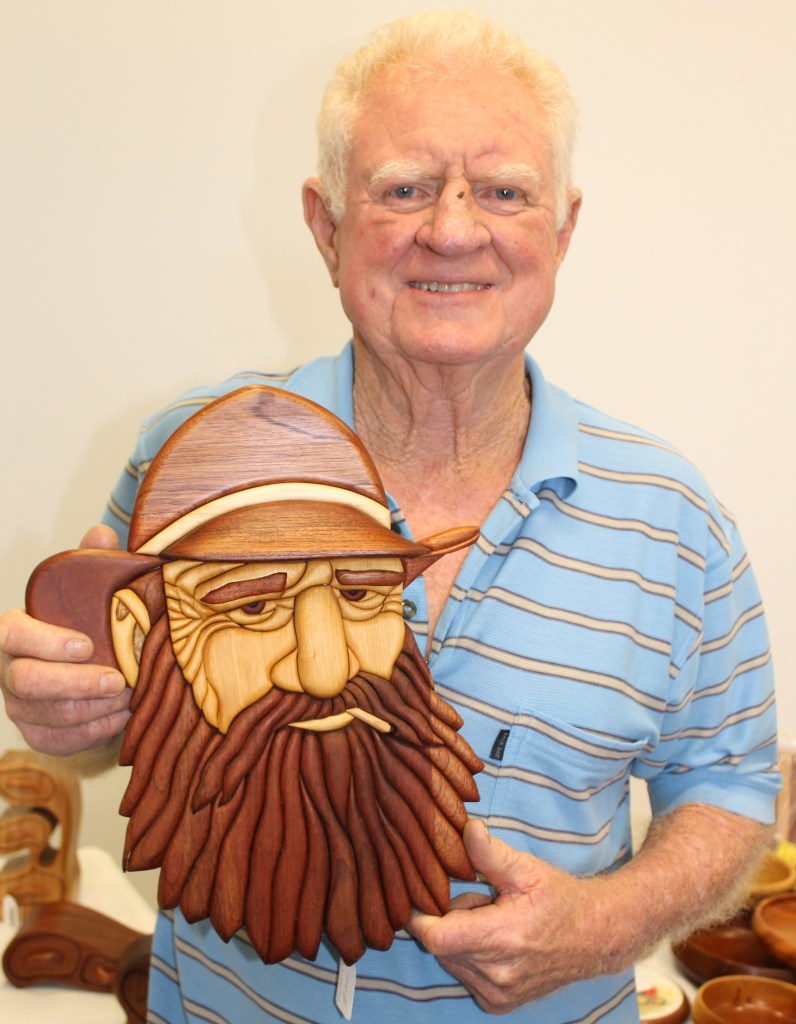
Bob Aitken has been trawling through his photo archives. He sent us a bunch of great photos of work by CVWA members, including this great pic of Bill Andrews with one of his marvelous intarsia works.